
What is a Facebook Page? A Facebook Page is where customers go to discover and…

How to set up Facebook Business Manager
Business Manager is a Facebook tool that helps organise and manage your business. When you join Business Manager, colleagues/agencies can’t view your personal Facebook profile unless you approve their friend requests. Colleagues/agencies can only see your name, work email address and the Pages and ad accounts you have access to.
You need a Facebook profile to create a Business Manager account. You use your Facebook username and password to sign into Business Manager. It’s a more secure way to log in than with just an email address and password.
Before you begin
Make sure that you have a personal Facebook account to confirm your identity. Facebook changes the way it does things, so the visuals in this quide and processes may be slightly different.
Create a Facebook Business Manager
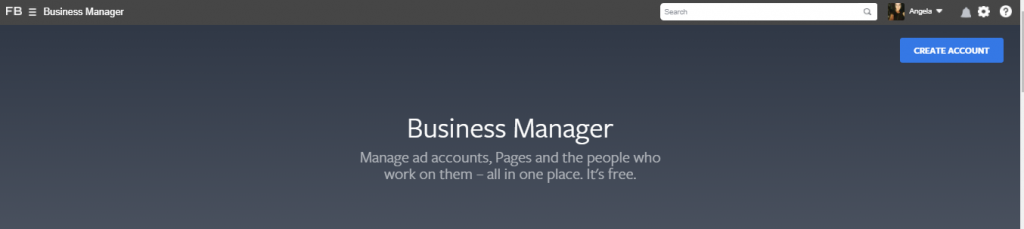
To create a Business Manager:
- Go to https://business.facebook.com/overview
- Click the blue Create account button.
- Enter the name for your business and account name, your name, and work email address.
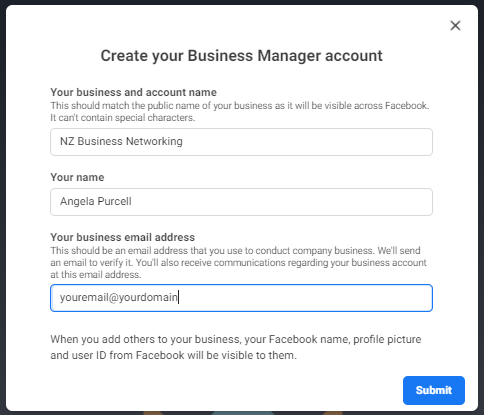
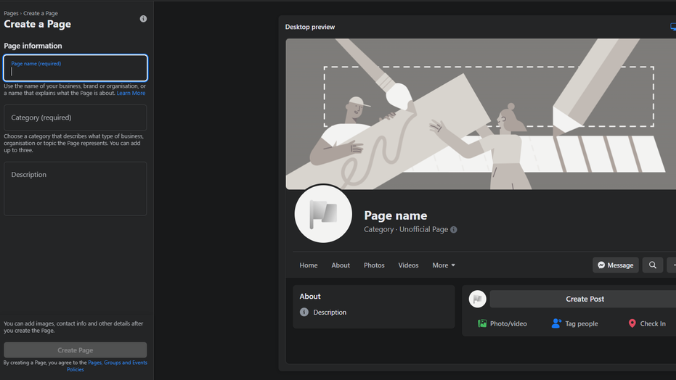
Note: If you don’t have a Page for your business, create one.
- Enter the rest of your information.
- An email with the subject “Confirm your Business” will be sent to the business email address you entered.
- Click the Confirm Now button in the email to receive full access to your account.
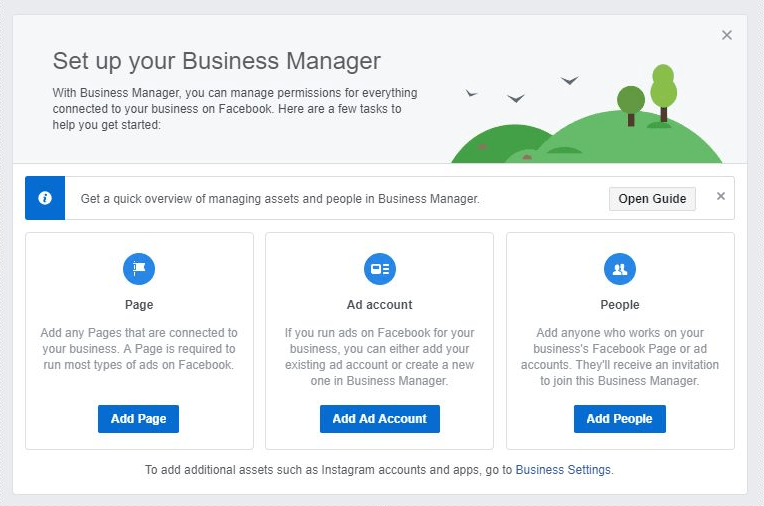
You have now successfully created a Business Manager account and can proceed to add your Facebook Page, Ad Account, Employees, and other assets.
Setup a Business Manager:
The 3 basic things you need to create ads on Facebook are:
- Facebook Page
- Ad Account
- People
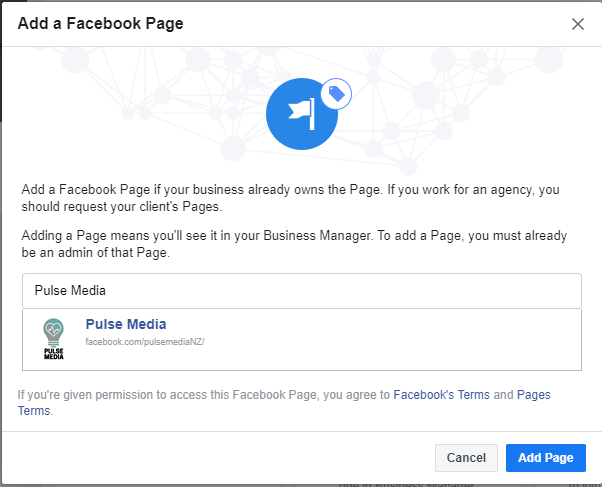
- Add your Facebook page. If you haven’t created a Facebook Page yet you can create one in Business Manager or via your personal Facebook profile. https://www.facebook.com/pages/creation
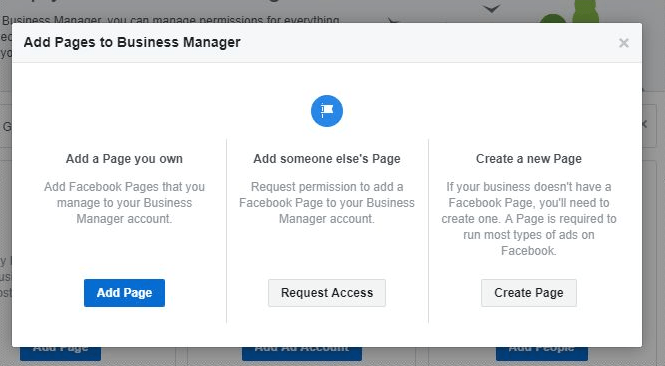
To add a page, you must already be an admin of that Page
- Create an Ad Account.
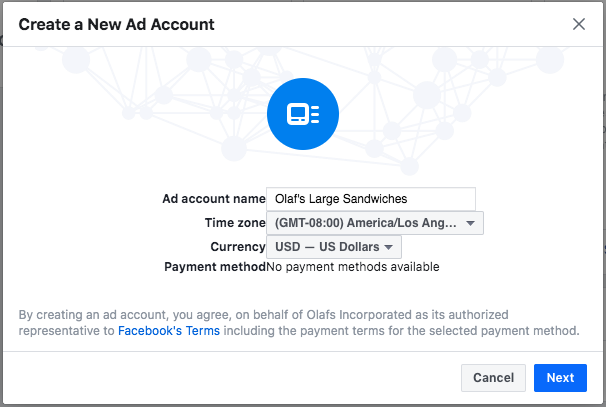
Payment methods are required to create ads on Facebook. Follow these steps for assigning payment methods when you first set up your Business Manager.
- Add the payment methods you want to use in Business settings – Payments – Add payment method.
- If you are eligible for a line of credit, check whether your credit line is available in Business Manager. You can do this by contacting your Facebook sales rep or by visiting facebook.com/business/resources and selecting the “Billing and payments” topic.
- Define permission levels in the “Finance roles” section. Choose “Finance editor” for those who will need to access credit lines or invoice details, and choose “Finance analyst” for those who will only need to view the information.
- Go to Business Manager – People and select the person who needs the role.
- Select the edit icon next to the person’s name. In the dialogue box under “Finance role”, make the appropriate selection.
- Update email addresses that need to receive invoices in Payments – Account credit – Invoice emails.
- View Unpaid delivery (balance) of credit line and general health in Settings – Payments.
- Share your credit line with other Business Managers that need to access it, such as agencies.
After you have completed the initial setup for payment methods, you can create ad accounts and assign payment methods and lines of credit to them as needed, on a day-to-day basis.
Give Access to Facebook Business Manager
To add partners or agencies to your business:

- Go to Business settings.
- Below Users, click Partners.
- Click + Add.
- Select Give a partner access to your assets.
- Enter the Partner business ID you want to add and click Next.
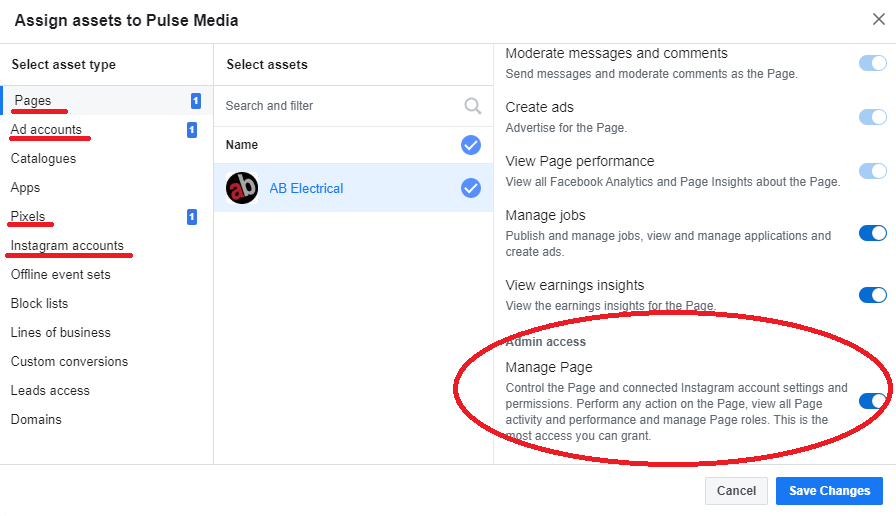
- On this screen, you can add partners to multiple assets. Choose a type of asset in the first column. Select the assets that you want to add your partner to in the second column. Assign a role for your partner in the third column. Repeat these steps until you’ve chosen roles for all of the assets that you want to assign. You will need to assign Pulse Media to the following assets – Admin Access to:
- Pages,
- Ad Accounts,
- Pixels and
- Instagram Accounts
- You need to do each asset above one by one.
- Click Save Changes, each time.
Your partner can now see the assets you assigned to them in their Business Manager.
Related Posts

Comments (0)