
Google Analytics 4 (GA4) is the latest version of Google Analytics. It was built from…
How to Create a Facebook Page
What is a Facebook Page?
A Facebook Page is where customers go to discover and engage with your business. Setting up a Page is simple and free, and it looks great on both desktop and mobile, so you can meet customers on any device.
With a Facebook Page, you can manage all aspects of your business to keep customers updated, publish and promote content, connect people with your products, and deliver seamless customer service experiences.
Step One: Create your Business Page
Facebook Business Pages are managed by a personal account, known as the Page administrator. A Page can have more than one administrator; more on this later.
You can either use your personal Facebook account or create a new profile with your work email address if you want to fully separate your personal and work lives. Most people use their personal Facebook accounts to create their business assets to save from having to log into two separate Facebook Accounts.
Log in to Facebook with your account, then create a Facebook Page. You can also click on the menu icon on the left, then click Page under the Create section.
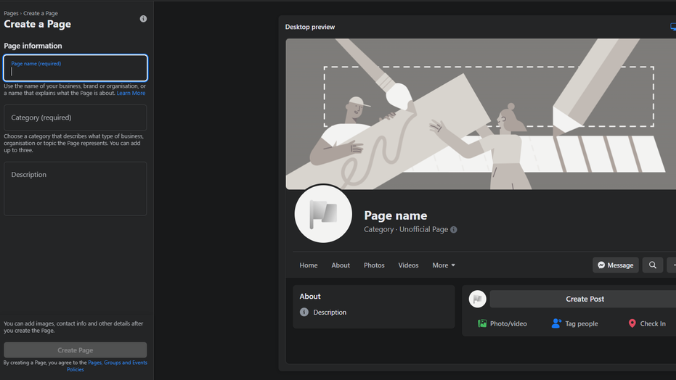
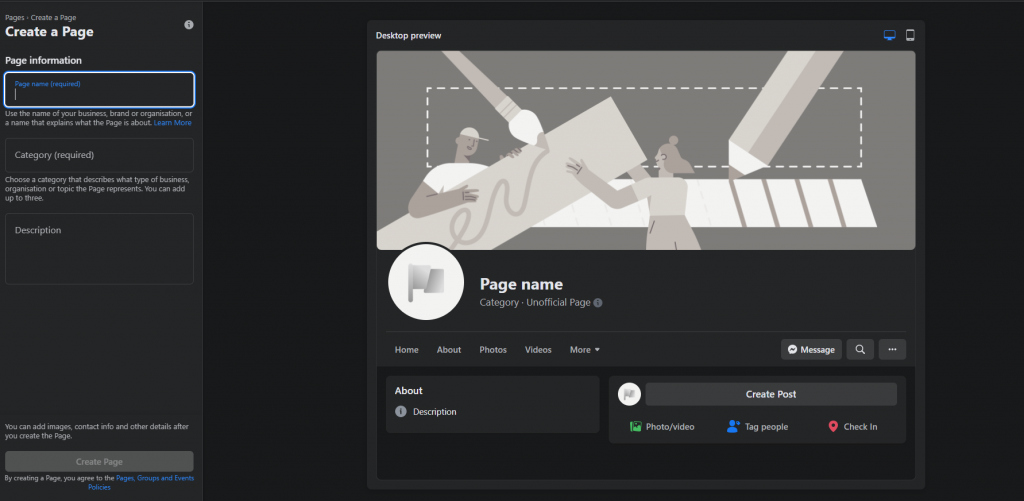
Step Two: Enter your Business Information
Fill in your business information. You can add more business details later, but you only need 3 things to create a Facebook Business Page:
- Name: This is the public name and title of your Page. In most cases, your business name by itself is enough. If there is another popular Facebook Business Page or company with the same name as you, you may want to add a descriptor so people can find you easier, like “Janet’s Gift Shop” instead of just “Janet’s.”
- Category: Start typing a word to describe your business and Facebook will suggest options. Choose what fits the best.
- Description/Bio: Your elevator pitch. Write a one or two-sentence summary of your business.
Then click on Create Page
Step Three: Complete your Facebook Page Information and Optimise
Follow the prompts to enter more details, like your business hours, website, phone number, and all that good stuff.
All these fields are optional, so if you don’t want to advertise your phone number or address, leave those blank.
Add your website: Ensure your website URL is there, and fill in a brief About description.
Turn on reviews. Build trust with new visitors by featuring ratings and reviews on your Facebook Page. When using this feature, ensure you’re keeping an eye on reviews to ensure they’re from real customers and not spammers trying to ruin your reputation. And, if any customers are unhappy, ensure you’re reaching out to make it right. Turn reviews on under Settings -> Privacy -> Page and tagging.
Edit your Page tabs: Choose to hide your Likes or Reviews, plus irrelevant sections like Music, Sports, Books, and more. From your Page management dashboard, tap More, then Manage sections.
Create a custom URL: Besides being easier to link to, a custom Facebook Page URL or username makes your Page seem more legitimate to customers. Set yours under Settings -> General Page Settings then tap Edit next to the Username field.
Create a pinned post (optional): Add a new post to offer something exclusively for your Facebook Page fans, such as a coupon. Or, use it to link out to your other offers, profiles, and more. It’s a good mini-introduction to your Page and business.
Step Four: Add Profile and Cover Photos
Your Page’s profile picture:
- Displays at 176 x 176 pixels on your Page on computers, 196 x 196 pixels on smartphones and 36 x 36 pixels on most feature phones.
- Is cropped to a circle.
Your Page’s cover photo:
- Left aligns with a full bleed and a 16:9 aspect ratio.
- Must be at least 400 pixels wide and 150 pixels tall.
- Loads fastest as an sRGB JPG file that’s 851 pixels wide, 315 pixels tall and less than 100 kilobytes.
For profile pictures and cover photos with your logo or text, you may get a better result by using a PNG file.
The left-hand side of your cover photo will be partially covered by your profile picture, and may be cropped and resized to fit different screens.
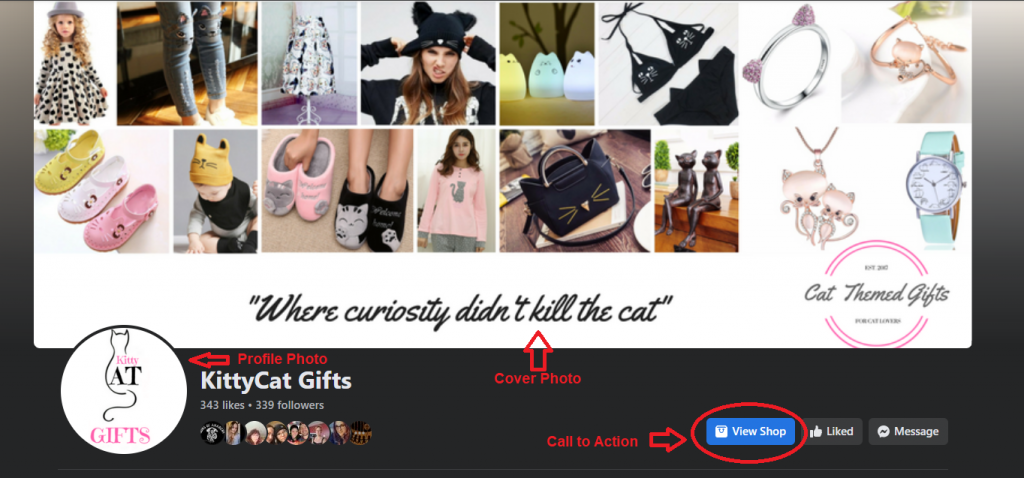
Step Five: Add a Call to Action Button
Pages that you manage may be in the new Pages experience. If you have Facebook access to a new Page, this article applies to you. If you have task access, you would manage new Pages from other tools, such as Facebook Business Suite or Creator Studio
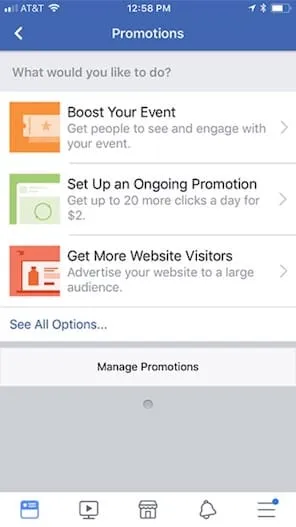
At the top of your Page, you can add a call-to-action that directs your Page visitors to do something, like visit your website or call your store.
Classic Pages
To add an action button to your Page, you’ll need to be an admin, editor, moderator or advertiser.
Action buttons can help your customers:
- Contact you through Messenger, WhatsApp or your website, or by email or phone
- Shop
- Start food orders
- Book a service
You may also see the option to connect services such as MyTime, HomeAdvisor or delivery.com to your Page.
To add an action button to your Page:
- From your Feed, click
Pages in the left menu.
- Go to your Page.
- Click + Add a Button below your Page’s cover photo.
- Select a button from the drop-down menu and follow the on-screen instructions.
- Click Save.
Once the button has been created, you can test your button:
- Click your button.
- Select Test Button.
New Pages experience
To add an action button to your Page on Facebook, you’ll need to have Facebook access. Bear in mind that you can add a Book Now button if you had the appointments feature set up for your classic Page before you switched to the new Pages experience.
- Log in to Facebook, then click your profile photo in the top right.
- Click See all profiles, then select the Page that you want to switch into.
- Click your Page in the left menu.
- From your Page, click
, then click Add Page Button.
- Select a button, then click Next.
- Follow the instructions on the screen.
- Click Save.
Related Posts


Comments (0)